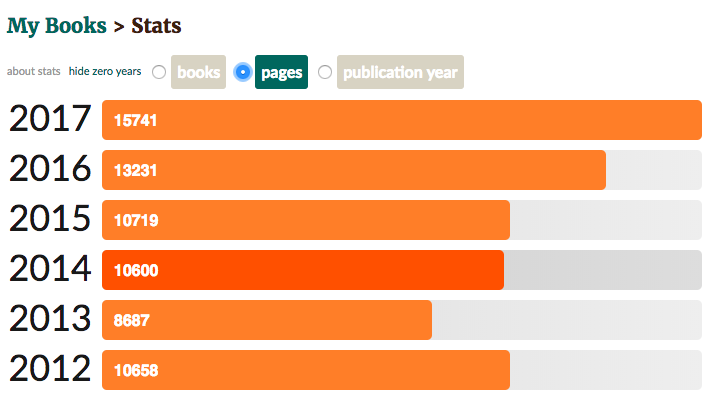
Some of the books I read this year were poetry collections and children’s books, so I’m always interested to see how my “pages read” stats compare year to year. Fifteen thousand seven hundred forty-one pages in 2017. (Thanks Goodreads!)
I’ll list them all this year—here’s what I read, beginning in January and ending in December:
Books Read in 2017
- “The World According to Mister Rogers: Important Things to Remember” by Fred Rogers
- “Modern Calligraphy: Everything You Need to Know to Get Started in Script Calligraphy” by Molly Suber Thorpe
- “Writing Down the Bones: Freeing the Writer Within” by Natalie Goldberg
- “Creative Block: Get Unstuck, Discover New Ideas, Advice, and Projects from 50 Successful Artist” by Danielle Krysa
- “Playing Big: Find Your Voice, Your Mission, Your Message” by Tara Mohr
- “Wherever You Go, There You Are: Mindfulness Meditation in Everyday Life” by Jon Kabat-Zinn
- “Living Color: Painting, Writing, and the Bones of Seeing” by Natalie Goldberg
- “Milk & Honey: A Love Story” by Alexandra Franzen
- “So This Is the End” by Alexandra Franzen
- “On Beauty” by Zadie Smith
- “The Postmistress” by Sarah Blake
- “Fluent Forever: How to Learn Any Language Fast and Never Forget It” by Gabriel Wyner
- “All the Light We Cannot See” by Anthony Doerr
- “Thrive: The Third Metric to Redefining Success and Creating a Life of Well-Being, Wisdom, and Wonder” by Arianna Huffington
- “Milk and Honey” by Rupi Kaur
- “The Yellow Envelope: One Gift, Three Rules, and a Life-Changing Journey Around the World” by Kim Dinan
- “The Miracle Morning: The Not-So-Obvious Secret Guaranteed to Transform Your Life (Before 8AM)” by Hal Elrod
- “Daring Greatly: How the Courage to Be Vulnerable Transforms the Way We Live, Love, Parent, and Lead” by Brené Brown
- “The Subtle Art of Not Giving a F*uck: A Counterintuitive Approach to Living a Good Life” by Mark Manson
- “Love Warrior” by Glennon Doyle Melton
- “Carry On, Warrior: Thoughts on Life Unarmed” by Glennon Doyle Melton
- “Forward: A Memoir” by Abby Wambach
- “Rising Strong” by Brené Brown
- “The Sketchnote Handbook: The Illustrated Guide to Visual Note Taking” by Mike Rohde
- “Refuse to Choose!: Use All of Your Interests, Passions, and Hobbies to Create the Life and Career of Your Dreams” by Barbara Sher
- “Brave Enough” by Cheryl Strayed
- “Spinster: Making a Life of One’s Own” by Kate Bolick
- “Tiny Beautiful Things: Advice on Love and Life from Dear Sugar” by Cheryl Strayed
- “Talking as Fast as I Can: From Gilmore Girls to Gilmore Girls, and Everything in Between” by Lauren Graham
- “This Is the Story of a Happy Marriage” by Ann Patchett
- “All Over the Place: Adventures in Travel, True Love, and Petty Theft” by Geraldine DeRuiter
- “The War of Art: Break Through the Blocks and Win Your Inner Creative Battles” by Steven Pressfield
- “Janesville: An American Story” by Amy Goldstein
- “Bird by Bird: Some Instructions on Writing and Life” by Anne Lamott
- “This Is How It Always Is” by Laurie Frankel
- “The Last Unicorn” by Peter Beagle
- “Ariel” by Sylvia Plath
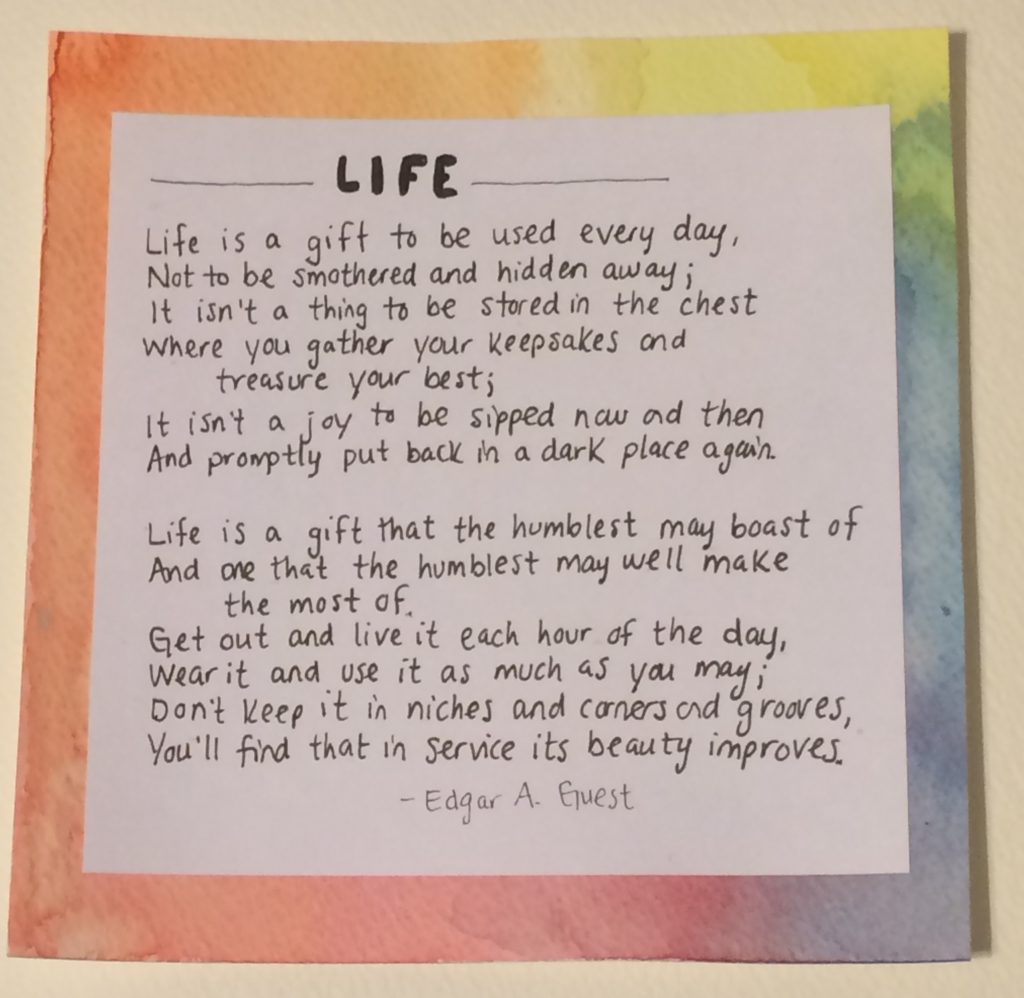
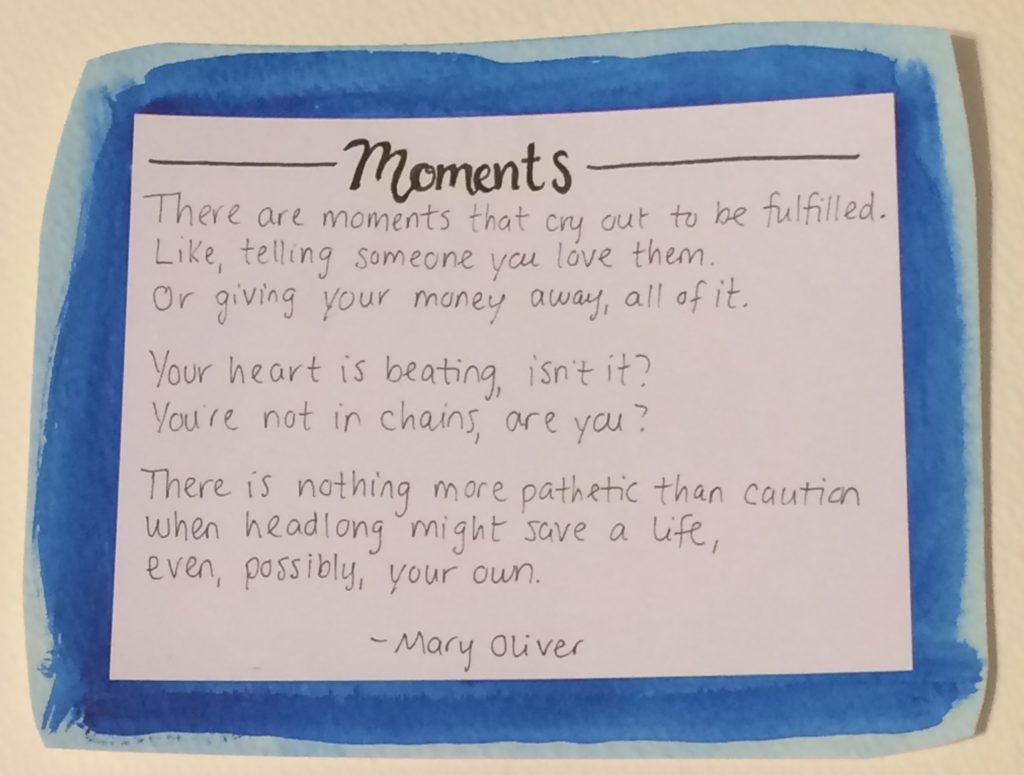
- “Dog Songs” by Mary Oliver
- “Felicity” by Mary Oliver
- “The Master and Margarita” by Mikhail Bulgakov
- “Ladies Drawing Night: Make Art, Get Inspired, Join the Party” by Julia Rothman
- “The Back of the Napkin: Solving Problems and Selling Ideas with Pictures” by Dan Roam
- “Harry Potter et les reliques de la mort” by J.K. Rowling
- “Our World” by Mary Oliver
- “Upstream: Selected Essays” by Mary Oliver
- “Blue Horses” by Mary Oliver
- “A Poetry Handbook” by Mary Oliver
- “Year of Yes: How to Dance It Out, Stand in the Sun and Be Your Own Person” by Shonda Rhimes
- “Worm Loves Worm” by J.J. Austrian
- “The Great Failure: A Bartender, a Monk, and My Unlikely Path to Truth” by Natalie Goldberg
- “Everything You Wanted to Know About Indians but Were Afraid to Ask” by Anton Treuer
- “Walking to Listen: 4,000 Miles Across America, One Story at a Time” by Andrew Forsthoefel
- “Steal Like an Artist: 10 Things Nobody Told You About Being Creative” by Austin Kleon
- “Just Diagnosed: The Five Keys to Living with MS from the Driver’s Seat” by Laura Sowinski
- “The Cuckoo’s Calling” by Robert Galbraith
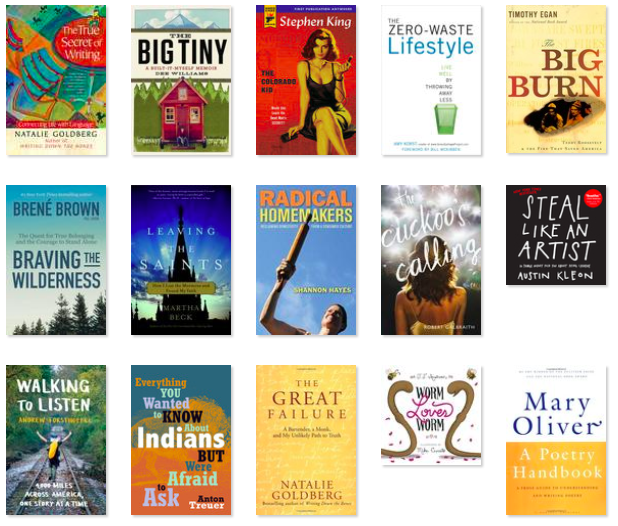
- “Radical Homemakers: Reclaiming Domesticity from a Consumer Culture” by Shannon Hayes
- “Leaving the Saints: How I Lost the Mormons and Found My Faith” by Martha Beck
- “Braving the Wilderness: The Quest for True Belonging and the Courage to Stand Alone” by Brené Brown
- “The Big Burn: Teddy Roosevelt and the Fire That Saved America” by Timothy Egan
- “The Zero-Waste Lifestyle: Live Well by Throwing Away Less” by Amy Korst
- “The Colorado Kid” by Stephen King
- “The Big Tiny: A Built-It-Myself Memoir” by Dee Williams
- “The True Secret of Writing: Connecting Life with Language” by Natalie Goldberg
Top 10 Books Read in 2017
I usually select five or so which I highlight as favorites, but this year I couldn’t get that number any lower than ten (plus some honorable mentions, below). In alphabetical order, I recommend:
“All the Light We Cannot See” by Anthony Doerr
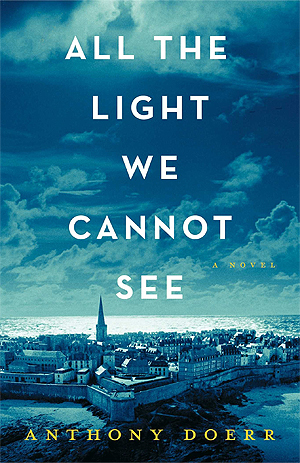
I started this historical fiction book when I was visiting my friend Max in Munich and finished it on the train into France—which happened to be so fitting because it takes place in both countries during World War II. (I hadn’t known what the book was about when I began reading.) There’s a reason this won the Pulitzer Prize and spent over two years on the New York Times bestseller list; I enjoyed getting lost in the story.
“The Big Burn: Teddy Roosevelt and the Fire That Saved America” by Timothy Egan

A friend in ACE recommended this one to me, and it was an interesting, educative read. I hadn’t read anything by Egan before, but he has the gift of bringing the past to life, so the retelling of these historical events was lively and engaging.
“Janesville: An American Story” by Amy Goldstein
 This story takes place in Janesville, Wisconsin—which lies just an hour southeast of where I’m from. The book follows several families/politicians/teachers before, during, and after the GM plant closing / recession of 2008. Although informative and well-researched, this book—like “Evicted”—is far from dry, filled with approachable and engrossing stories.
“Leaving the Saints: How I Lost the Mormons and Found My Faith” by Martha Beck
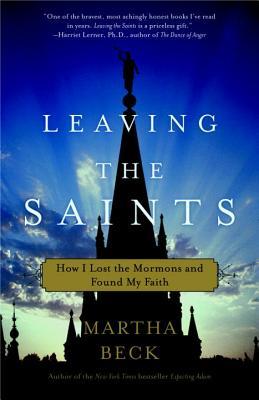 This memoir was incredible. I’ll definitely be reading more of Martha Beck this year.
“Love Warrior” by Glennon Doyle Melton
 Another incredible memoir. What a treat to read! I also read her other book, “Carry On, Warrior” this year, which I enjoyed and recommend as well.
“Playing Big: Practical Wisdom for Women Who Want to Speak Up, Create, and Lead” by Tara Mohr
 In case anyone missed my ooh-ing and aah-ing over this one last year, I’m including it again because I reread it at the start of the year. If you were a “good student” in school, this book is full of practical ways to break from good-student habits we women are taught at a young age—in order to lead, create, and speak up in our communities.
“Radical Homemakers: Reclaiming Domesticity from a Consumer Culture” by Shannon Hayes
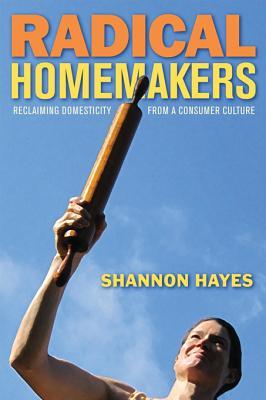
This book articulated so well many ideas I’d partially uncovered on my own. How refreshing to see a fuller picture, though, and to consider ideas I hadn’t yet stopped to consider. For example: What does a country’s GDP really indicate? It’s not a measure of personal well-being, so why does society care so much about a “healthy” GDP? Here’s a snippet from the Goodreads summary:
“Radical Homemakers nationwide speak about empowerment, transformation, happiness, and casting aside the pressures of a consumer culture to live in a world where money loses its power to relationships, independent thought, and creativity. If you ever considered quitting a job to plant tomatoes, read to a child, pursue creative work, can green beans and heal the planet, this is your book.”
“Tiny Beautiful Things: Advice on Love and Life from Dear Sugar” by Cheryl Strayed
 Incredibly beautiful writing and a joy to read. Definitely a book I’ll reread in the future, as well as gift to high school / college graduates.
“Walking to Listen: 4,000 Miles Across America, One Story at a Time” by Andrew Forsthoefel
 This memoir particularly gripped me because walking the country is something I’d thought of doing years ago—though I hadn’t had an idea for a “reason”/name/project and never moved an inch forward. Andrew Forsthoefel did, however, and five years later he wrote a book about his experiences. Not only is the story compelling and a neat way to get an up-close-and-personal tour of various regions of the USA, but the writing is beautiful to boot.
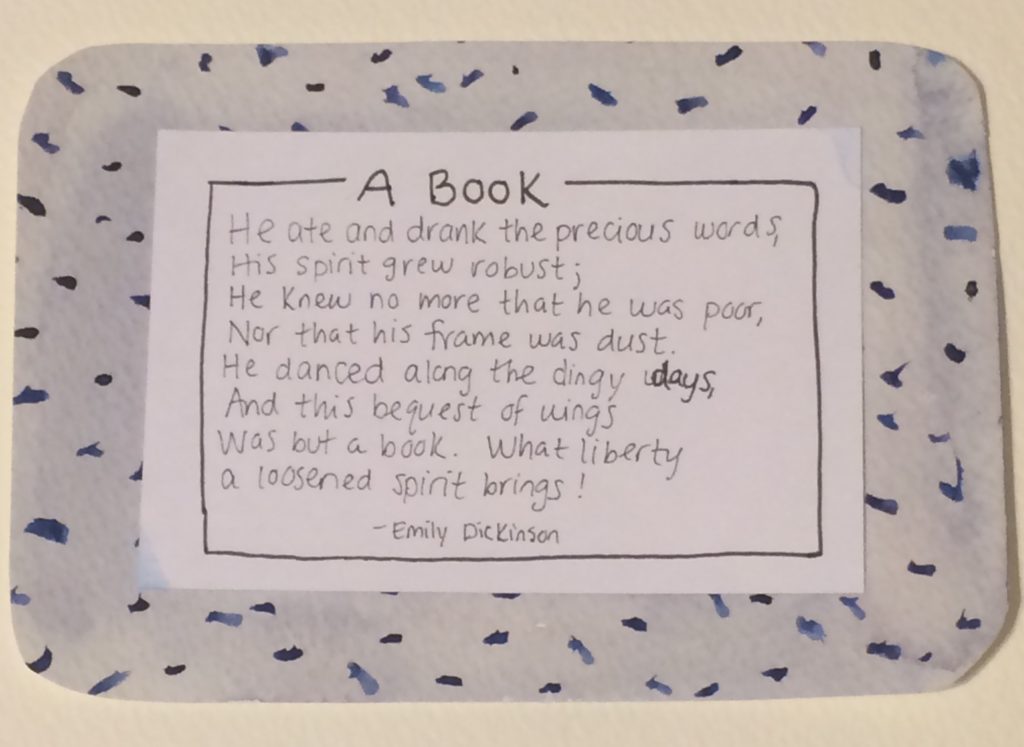
“Writing Down the Bones: Freeing the Writer Within” by Natalie Goldberg
 Oh, Natalie. This was the first book I read by Natalie Goldberg, and I couldn’t believe it had taken 28 years for us to meet! After this one I read several others by Natalie throughout the year, and there are plenty more of hers I’d like to read. I’m happy to have gained another role model this year.
2017 Books Read: Honorable Mentions
- “Braving the Wilderness: The Quest for True Belonging and the Courage to Stand Alone” by Brené Brown — I read two of Brené’s other big ones this year as well (“Daring Greatly” and “Rising Strong”), and wanted to highlight at least one of hers somewhere in this post. Her latest book nicely summarizes many concepts I’ve learned over the years—so nothing breakthrough for me, but she’s certainly a helpful voice to have a stage, especially during this political climate.
- “Felicity” by Mary Oliver — If anyone’s new to poetry like I am, this Mary Oliver collection was an enjoyable read. (Additional shoutout to Oliver’s “Upstream: Selected Essays”)
- “The Master and Margarita” by Mikhail Bulgakov — I read this book because Regina Spektor mentioned it in an interview somewhere. I was also curious to read a Russian author and a fiction book (I usually find myself reading within the non-fiction genre). It was sure interesting! I didn’t understand the deeper metaphors that must have been going on, but the story itself kept my interest the whole time.
- “On Beauty” by Zadie Smith — This was my first Zadie Smith book, found on the bookshelf while I was HelpXing on the farm in Italy, and I enjoyed getting lost in her story.
- “The Postmistress” by Sarah Blake — This is another one from the bookshelf on the farm in Dozza, and it was also an enjoyable fiction read.
- “Wherever You Go, There You Are: Mindfulness Meditation in Everyday Life” by Jon Kabat-Zinn — I finished reading this at the start of 2017 and wanted to mention it somewhere, as it was a peaceful read which nurtured mindfulness.
Finally, if you’d like to see five more years of past year-end book reviews, they are below.
>>Past years in books: 2012 // 2013 // 2014 // 2015 // 2016
Your turn! What were your favorite reads of the year? What do you recommend I read in 2018? I’d love to hear what you have to say—the space below is yours to comment your heart out!